Email Address and Notes Enhancer App
The Email Address and Notes Enhancer App adds flexibility and personalization to automated Email processing. The Email Address Enhancer App adds flexibility and personalization to email automation, including setup of multiple user email addresses.
Overview
Microsoft Dynamics 365 Finance supports only one Email address to send all automated Emails. When automated emails are generated, users select their specific email address, so emails come from a person, not a generic “admin” account. We also added the ability to add a personalized note to each automated Email to add a call to action or request for additional information.
By simplifying the scanning process, you are saving time by letting recipients (ex: Customers and Vendors) know who is sending the Email so they can respond directly to the appropriate person if additional action is needed.
Customer Email addresses
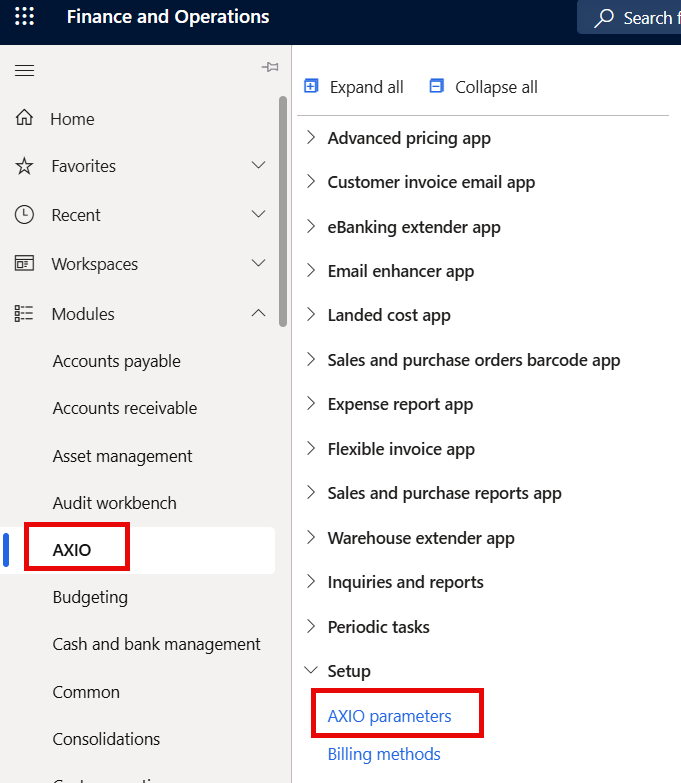
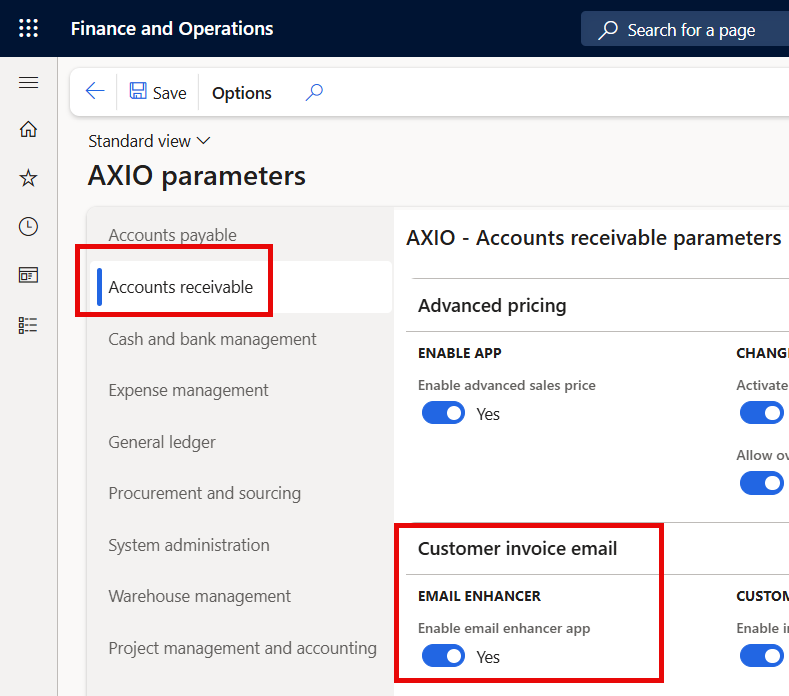
Navigate to: AXIO > Setup > AXIO Parameters > Accounts receivable > Customer Invoice email > Email Enhancer > Enable email enhancer app.
Set Enable email enhancer app option to TRUE.
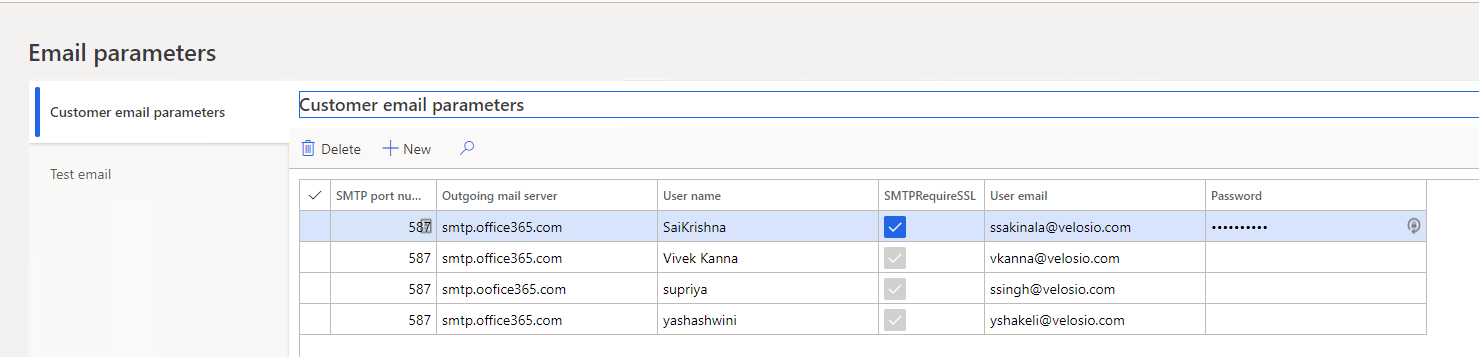
To review or modify custom email parameters, navigate to: AXIO > Email Enhancer App > Custom email parameters.
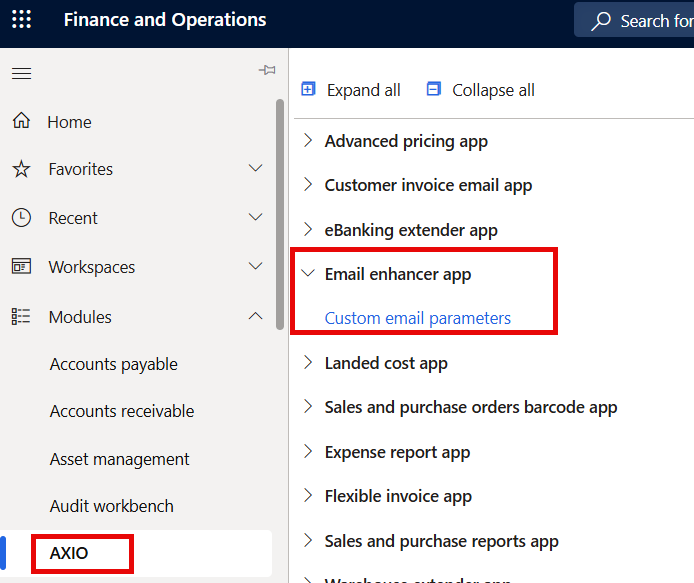
The Custom email parameters is displayed and additional Emails may be added, as necessary. Click Save.
To test the Email, click on Test Email and fill in the fields. Click Send test Email.
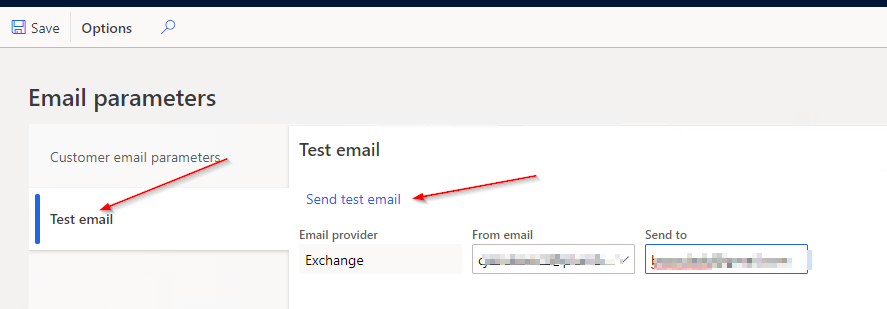
Click Send test Email to send the Email and a notification will display when it is sent.
Statements
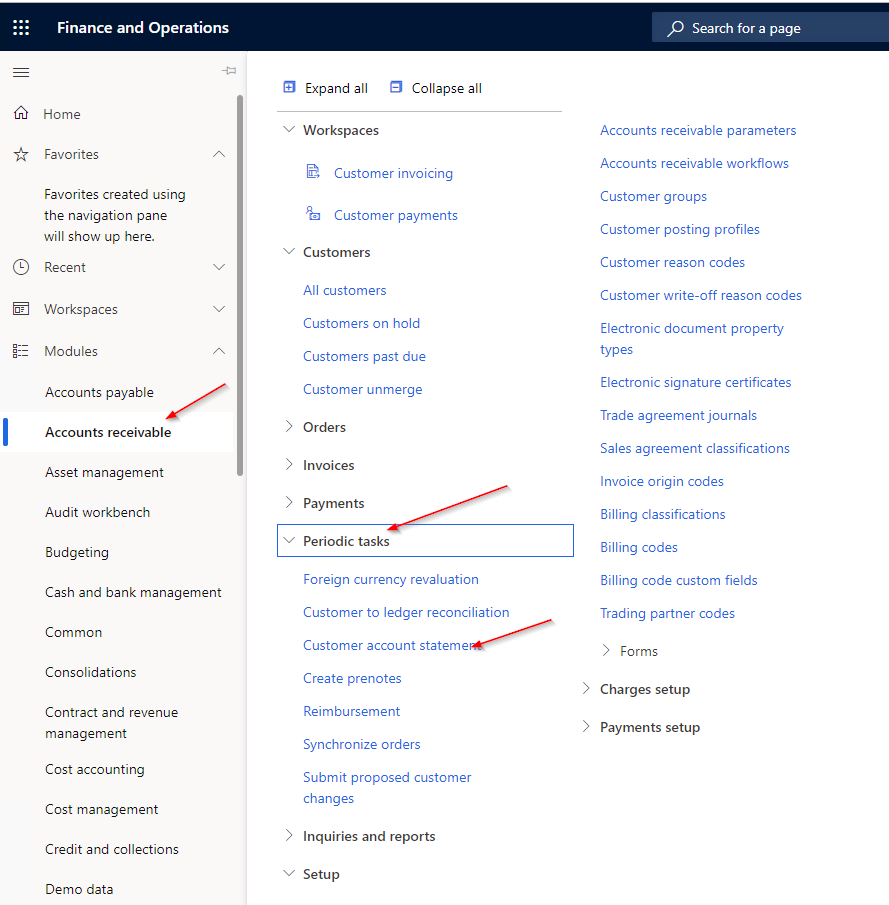
Navigate to: Accounts receivable -> Periodic tasks -> Customer account statement.
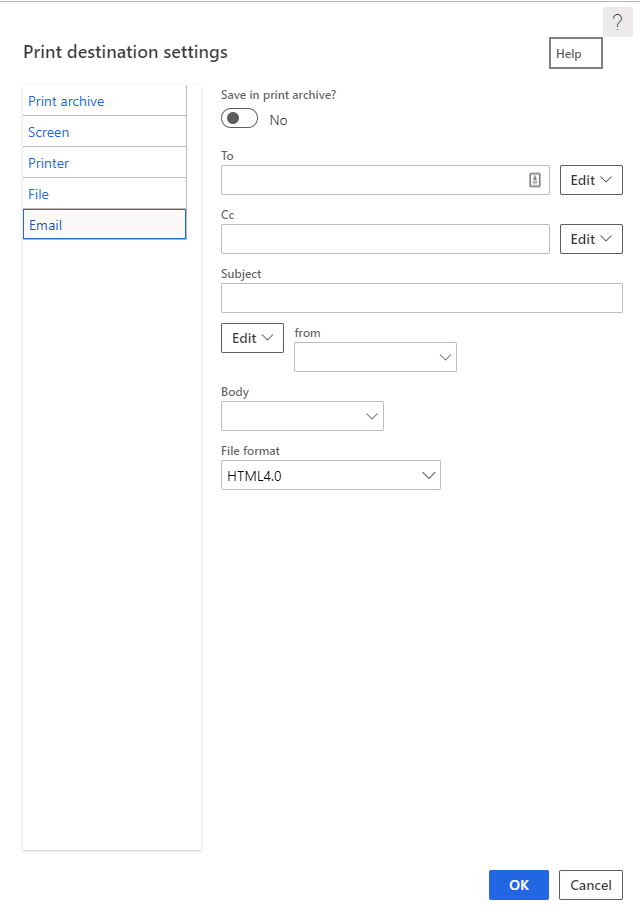
The Customer account statement page opens. Complete the information for the statement to print and click Change.
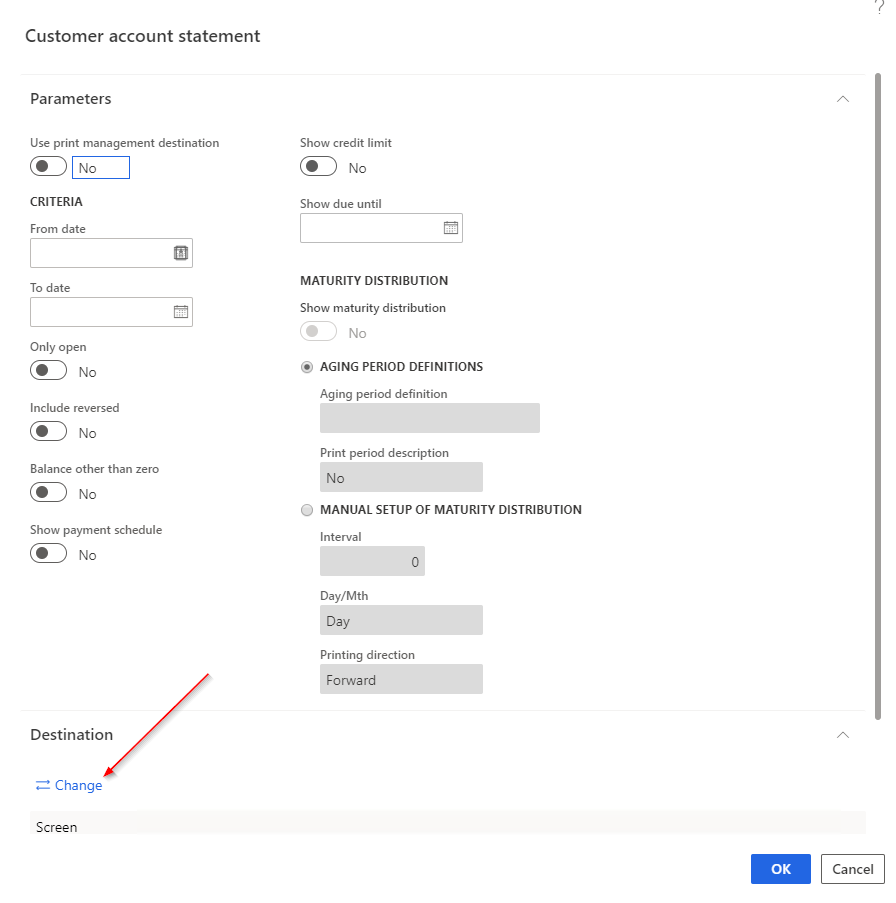
The Print destination settings page opens and Email information may be entered. The format can also be modified to change the From address so that it comes from a different specified Email address. A template for the Email may be selected as well. The template can be customized as required and any notes or additional information about the statements can be added. Once the form is complete, click OK to send the customer statement.